I’m sure almost everyone involved with iRacing and just about any other online game has heard of TeamSpeak. Most of them have probably used it and many still do. If you have a team, a league, or any kind of organized racing group, you probably use some voice chat software, whether it’s TeamSpeak, Mumble, or Ventrilo. Some groups even use Skype. Out of all of these, TeamSpeak seems to be the most popular among iRacers, FPS clans, and most other types of gamers.
Although TeamSpeak is popular and usually works very well, it does have some shortfalls. The text chat is very limited on TeamSpeak. You really can’t do a lot in the text chat window. Links work, but you can’t insert images. Forget about inserting a video. The list of emoticons is paltry, with only ten tiny little smileys. Text chat is just no fun in TeamSpeak. I understand that it was developed for voice chat, but why eliminate the fun and interesting parts of modern text chat? You also have to rent a TeamSpeak server from a third party or host your own server.
Enter Discord. I’m not crazy about the name. It sounds like an argument right out of the box. But Discord is so much better than TeamSpeak in all respects except for one. The voice quality is better, and the text chat component leaves TeamSpeak in the dust. And, of course, the big advantage that Discord has over TeamSpeak: Discord provides a FREE server and server setup is easy and seamless. Discord makes the app, and Discord provides the server. That makes things a LOT easier. You don’t have to go to a third party and rent a server. Just download the app and set up your own server in minutes.
The only thing that Discord lacks is an overlay, and that’s only partially true. The Discord team has developed an overlay, but it only works in the most popular games, at least for now. That’s good if you’re playing the latest FPS, but not so good if you’re an iRacer. Overlays are nice, but they’re not really necessary. The lack of a working overlay for iRacing might be a deal breaker for some, but it’s not for me. The superior voice quality and text chat, and the free, no hassle server more than make up for it.
Congratulations if you made it through that wordy introduction. Now on with the beef. This article is geared specifically for those who want to install Discord and join a Discord server. If you want to set up your own Discord server, you can find a wealth of information over on the Discord help pages.
How to Install Discord
This part is easy. To install it, you first need to download it. Yes, you can participate in voice and text chat from the Discord website without downloading anything. The only problem with that is, your browser window has to maintain focus, meaning it has to be on top of all other windows. If you open another tab in your browser, the web version of Discord won’t work any more. You have to go back to the Discord tab to use Discord again. If you run iRacing, same thing. The Discord window will lose focus while you’re playing iRacing (or any other game) and you won’t be able to hear anyone and you will have no voice in the Discord channel. So it’s best to download the desktop app and install it so all of the functions are available to you.
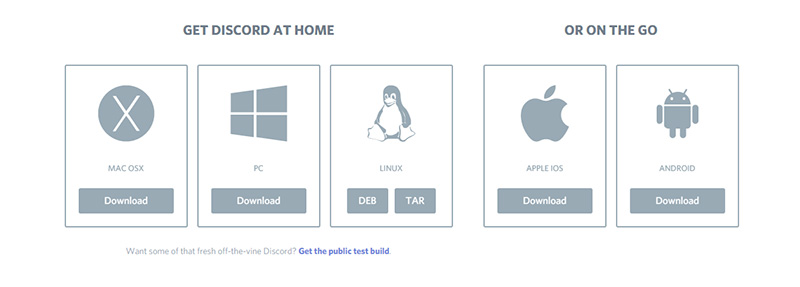
To download Discord, head on over to the Discord App download page at http://discordapp.com/apps where you will be presented with this:
Your selection should be obvious to you. Most people are running Windows so PC would be your option. If you’re running a Mac, of course you want the Mac version, etc. While you’re here, you might want to pick up the appropriate smartphone app. Discord’s smartphone app is free and it works great. This is another advantage that Discord has over TeamSpeak. Want the TeamSpeak app? You will pay two bucks for it.
After you have downloaded your Desktop app, just install it. It installs very quickly and easily.
The next step is to create a Discord account if you don’t already have one. Click Register, input your email address, username and password and click Continue. Easy peasy.
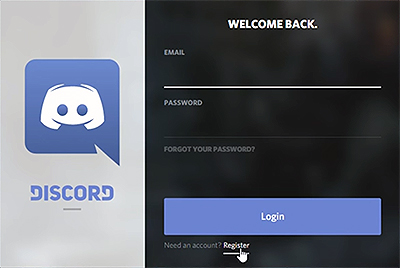
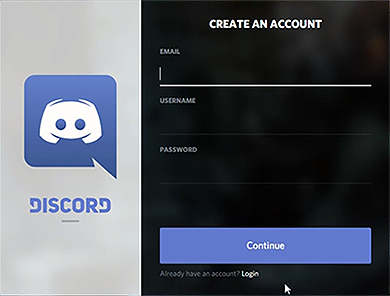
You will need to verify your email address before continuing. This is done in the usual way. You’ll get an email. Click the link to verify your address.
Now back to the Discord window where you will be prompted to either Create a Server or Join a Server. If you select Create a Server, you’re on your own from here until I get to the client setup part of this tutorial. If you click Join a Server, carry on.
When you select Join a Server, you will be asked to enter an Instant Invite.
The Instant Invite is just a link with a code for the server appended. The Instant Invite link to the OSR Discord server is https://discord.gg/0mFH1PK1JFNb0IiQ. Memorize it. 😆
Now that you got it installed and you’re connected to the OSR Voice/Text Chat Server, it’s time to move on to what is really the most important part: setting up the sound options in Discord. This is sometimes a little more challenging for some users, but I’ll make it easy for you.
To set up your sound options, click the User Settings cog, or gear icon at the bottom of the Discord window, over toward the left. It looks like this. ![]() You can right click it too. Right clicking pops out a quick User Settings menu. Either way, click it and select Voice from the menu.
You can right click it too. Right clicking pops out a quick User Settings menu. Either way, click it and select Voice from the menu.
Now you will be looking at something similar to either one of the images below.
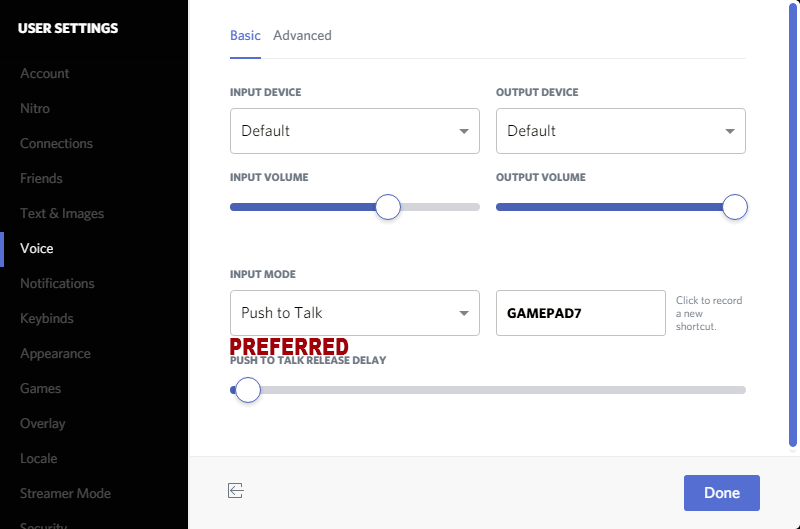
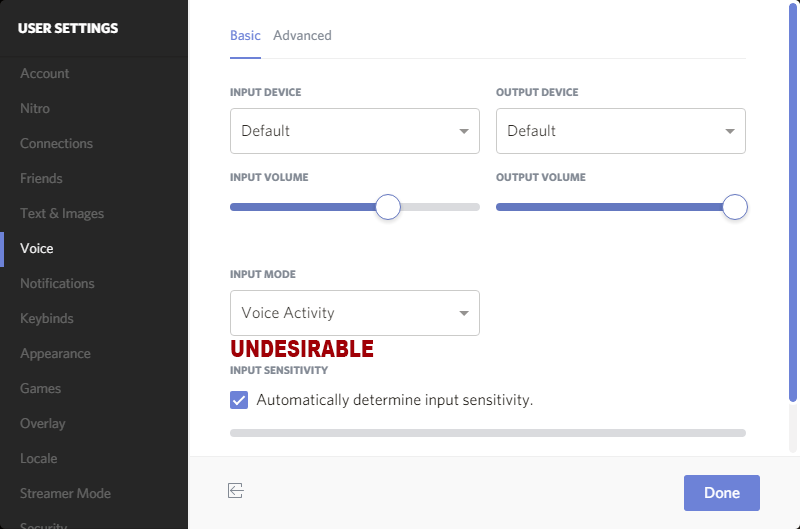
You usually won’t have to change Input Device or Output Device settings at the top. If your mic isn’t working at all, you can try changing your Input Device. If you have no sound coming out of your speakers, you can try changing your Output Device.
Note: At one time, the section below on Voice Activity was worded more strongly. It was all in fun, but someone advised me that some delicate little snowflakes might take it personally and get butt hurt over it, so I toned it down a little. The point is, have a little consideration for others and try not to be so annoying.
There are two very important Voice settings on the page. The first one is the choice between Push to Talk and Voice Activity. In my experience, Voice Activity is annoying to other people on the server. It’s annoying because everyone else can hear you while you’re cursing them during the race. They can hear you mumbling to yourself. They can hear you when you’re typing. They can hear you when you click the mouse. They can hear you working the pedals. They can hear you shifting gears. They can hear your significant other nagging you to take out the garbage. They can even hear you breathing sometimes. In other words, other people on the server can hear every sound you make. There’s nothing like driving in a race and hearing your own spotter and someone else’s spotter on a half second delay. It’s confusing and annoying. The point is, have a little consideration for others and try not to be so annoying.
Now, if you’re going to take the time to work on the Voice Activation settings, specifically, the Input Sensitivity, and if you can get it set to where it is only activated by your voice, then it doesn’t matter. I decided long ago, before Discord, before TeamSpeak, way back when I was using Ventrilo or something, that Voice Activation is a bad idea and it’s not even worth the time to set it up properly. How hard is it to map a button on your wheel? See the next paragraph and you’ll find out that it’s really easy.
The second very important setting on this page is the box right beside the Input Mode box. In the first image above, it says GAMEPAD7. That’s my push-to-talk button on my Logitech G27 steering wheel. Why is that important? Because you don’t want to set it to the same button you use to key your microphone in the iRacing simulator. This is also annoying to others who are on the same Discord server and in the same race as you are. Those people can hear you twice as loud and in an echo chamber. If you use the same button to key your mic in Discord as you do to key your mic in iRacing, people hear you in both Discord and iRacing. There is always more delay on one than the other so they get you once then they get you again 150 milliseconds later. Again, this is just voice server etiquette. Try not to be annoying to others. Choose a different button. To select a button just click inside the little box and press your button of choice. Use this for your steering wheel button of choice. I’ll tell you how to set a key on your keyboard later. Don’t click done quite yet.
If you look up at the top, you will see that you are on the Basic Voice Settings page. Now click Advanced. See where it says Noise Suppression? I would UNCHECK that unless you’re in a war zone or something. This setting attempts to suppress background noise. What it really does is make your voice sound odd and sometimes unintelligible. Now you can click Done.
Extra Credit: In your system tray, right click that little speaker icon. Click Recording Devices. Double click the device with the green check mark beside it. It usually says Microphone. Click the Enhancements tab. Voila! Look at that! There is Noise Suppression again! I would uncheck it if it’s checked. It’s the same thing as the one in Discord. It creates more problems than it solves. If you don’t see it in your Windows settings, don’t worry. It depends on what type of sound device you have and the driver software being used for it.
Now let’s say you don’t have a dedicated racing rig and you set your steering wheel aside when you’re not iRacing. You might be playing another game or you might be writing some article on a blog or you might be busy hacking John Podesta’s email. While you’re doing whatever you’re doing, you might still want to use Discord for voice chat. Your steering wheel is off over there, so it would be convenient to bind a key on your keyboard to key your Discord microphone.
- Click the User Settings cog.

- Click Keybinds.
- Select Push to Talk in the drop down.
- Click in the box on the right and press the key you want to bind. I use scroll lock because I don’t use that for anything else.
- Click Done.
If you use Discord very much, there’s one other thing I’ll discuss here briefly. If you right-click on a user name, you will get an options menu for that user. You can do things like adjust that user’s voice volume, mute that user, or make a note about that user. The individual voice volume is handy. Some people are louder, some are softer, so you can just adjust them individually to get everybody just right. I use the notes to store real names (iRacing names). It helps me remember who everybody is since people often use different nicknames on Discord. Then when I forget (which I do often) I just left-click the nickname and the iRacing name is right there.
Now you should be all set to use Discord in iRacing, or outside of iRacing. I hope this helps. If you have any questions, join me in Discord or contact me here.
