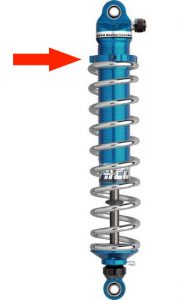
 There is plenty of confusion among newer iRacing members (and even some members that have been around for a while) about how to properly adjust the springs or change the cross weight in iRacing Legends setups. I will be creating tutorials on this topic for other asphalt oval cars, but I’m going to start with the Asphalt Legends car because it is the simplest car to adjust. Keep in mind that these adjustments may look different and some of the components may be named differently in each car, but the adjustments are made the same way.
I’m going to keep the tutorial brief. Please read and follow along step by step.
How to Adjust the iRacing Asphalt Legends Ford ’34 Coupe Springs:
- Before you start: Note the ride height on the corner you are about to adjust and also note the cross weight that is in the car.
- Soften a spring to get more grip on that corner of the car; Stiffen the spring to loosen that corner of the car. Example: You might soften the right rear spring to get more grip on the right rear, thereby tightening the car on exit.
- Make an additional adjustment to the Shock collar offset to return the ride height on that corner of the car to where it was originally, or as close as you can get it.
- Check your cross weight. It should be the same as it was before your adjustments, or close to it. You typically won’t have to readjust the cross weight at this point.
- Test it.
How to Adjust the iRacing Asphalt Legends Ford ’34 Coupe Cross Weight:
- In order to lower the cross weight, click the down arrows beside the left front and right rear Shock collar offsets, then click the up arrows beside the right front and left rear Shock collar offsets.
- In order to raise the cross weight, do the opposite: click the up arrows beside the left front and right rear Shock collar offsets, then click the down arrows beside the right front and and left rear Shock collar offsets.
- Test it.

Always try to change all four corners. You can change two corners to get a smaller adjustment, but if you need more of a change be sure to change the other two corners to keep a balance.
The wording here is simplified so that you can quickly tune the cross weight and test it without getting into a lot of details. If you want to understand more about what you’re doing and what you’re changing, read on.
When you click a down arrow on the Shock collar offset, you are decreasing or lowering the shock collar offset but you are increasing the weight on that corner of the car and your are increasing the ride height on that corner of the car as well. So, when you lower the cross weight, you increase the weight on the left front and the right rear and decrease the weight on the right front and the left rear. This is where your cross weight percentage comes from. The cross weight is given as the actual percentage of the weight on the right front and left rear of the car. When you remove weight from those two corners of the car, you are lowering the cross weight.
Increasing the cross weight in a car generally makes the car a little tighter, and vice versa.
This article will be moved to the iRacing Help | iRacing Setup Help section of this website in the near future.
Soften a spring to get more grip on that corner of the car; Stiffen the spring to loosen that corner of the car. Example: You might soften the right rear spring to get more grip on the right rear, thereby tightening the car on exit.
Make an additional adjustment to the Shock collar offset to return the ride height on that corner of the car to where it was originally, or as close as you can get it.
I have been fooling around by trial and error for a year now. This says it so succinctly I wish I had read it a year ago.